Speech Synthesis (TTS)
After installing the required dependencies and configuring conf.yaml, enable the corresponding speech synthesis engine by modifying the TTS_MODEL option in conf.yaml.
sherpa-onnx (Local & Recommended)
Available since version
v0.5.0-alpha.1(PR#50)
sherpa-onnx is a powerful inference engine that supports multiple TTS models (including MeloTTS). It is built-in supported and uses CPU inference by default.
Configuration Steps:
- Download the required model from sherpa-onnx TTS models
- Modify
conf.yamlreferring to the configuration examples inconfig_alts
For GPU inference (CUDA only), please refer to CUDA Inference.
Piper TTS (Local & Lightweight and Fast)
Piper is a fast, local neural text-to-speech system that supports multiple languages and voices. It uses pre-trained ONNX models and can achieve real-time speech synthesis on CPU.
Installation Steps
- Install piper-tts:
uv pip install piper-tts
-
Download model files:
-
Piper requires trained ONNX model files for speech generation
-
Recommended models:
zh_CN-huayan-medium- Chinese (Mandarin)en_US-lessac-medium- Englishja_JP-natsuya-medium- Japanese
-
Download methods:
- Method : Manual download
- Chinese model: https://huggingface.co/csukuangfj/vits-piper-zh_CN-huayan-medium/tree/main
- Other models: Search "piper" on Hugging Face or train your own
- Method : Manual download
-
File placement:
- Download both
.onnxand.onnx.jsonfiles to themodels/piper/directory
- Download both
-
-
Configure in
conf.yaml:
piper_tts:
  model_path: "models/piper/zh_CN-huayan-medium.onnx"  # ONNX model file path
  speaker_id: 0              # Speaker ID for multi-speaker models (use 0 for single-speaker models)
  length_scale: 1.0          # Speech rate control (1.0 = normal, >1.0 = slower, <1.0 = faster)
  noise_scale: 0.667         # Audio variation level (0.0-1.0)
  noise_w: 0.8               # Speaking style variation level (0.0-1.0)
  volume: 1.0                # Volume (0.0-1.0)
  normalize_audio: true      # Whether to normalize audio
  use_cuda: false            # Whether to use GPU acceleration (requires CUDA support)
- Set
tts_model: piper_ttsinconf.yaml
Features
- ✅ Completely local, no internet connection required
- ✅ Real-time CPU inference, fast speed
- ✅ Supports multiple languages and voices
- ✅ Supports GPU acceleration (optional)
- ✅ Small model files, easy to deploy
For more model options, visit the Piper Voice Samples page to listen and download models for different languages and voices.
pyttsx3 (Lightweight and Fast)
A simple and easy-to-use local TTS engine that uses the system's default speech synthesizer. We use py3-tts instead of the more famous pyttsx3 because pyttsx3 seems unmaintained and failed to run on the test computer.
Configuration Steps:
- Install by running
uv pip install py3-tts - Set
tts_model: pyttsx3_ttsinconf.yaml
-
- Install using the command
uv pip install py3-tts.
- Install using the command
-
- This TTS engine has no configuration options, simply set
tts_model: pyttsx3_ttsinconf.yaml.
- This TTS engine has no configuration options, simply set
This package will use the default TTS engine on your system:
- Windows uses the sapi5 engine
- macOS uses the nsss engine
- Other platforms use the espeak engine
MeloTTS (Local Deployment)
- It is strongly recommended to use MeloTTS through sherpa-onnx, rather than installing the more complex official version
- MeloTTS has dependency conflicts with Coqui-TTS. Please do not install them simultaneously
- The official version of MeloTTS may encounter mps-related errors on macOS (solutions are welcome)
Installation Steps
Starting from project version
v1.0.0, we useuvto manage dependencies, which greatly simplifies the installation process of MeloTTS.
- Install MeloTTS and necessary components:
# Install MeloTTS
uv add git+https://github.com/myshell-ai/MeloTTS.git

# Download unidic
python -m unidic download
- Download additional dependencies:
# Enter Python interpreter
python

# Download necessary NLTK data
>>> import nltk
>>> nltk.download('averaged_perceptron_tagger_eng')
# Press Ctrl+D to exit the interpreter when finished
- Configure and enable:
- Edit the project's
conf.yamlfile - Set
tts_modeltomelo_tts
Additional Notes
- Official documentation: MeloTTS Installation Guide
- If encountering
mecab-pythonrelated issues, try using this branch (Note: As of 2024/7/16, it has not been merged into the main branch)
Coqui-TTS (Local Deployment)
- Coqui-TTS has dependency conflicts with MeloTTS. Please do not install them simultaneously
Coqui-TTS is an open-source speech synthesis toolkit that supports multiple models and languages. The inference speed depends on the size and complexity of the chosen model.
Installation Steps
# Install Coqui-TTS and its language support
uv add transformers "coqui-tts[languages]"
Model Configuration
- View available models:
uv run tts --list_models
- Configure in
conf.yaml:
 coqui_tts:
      # Name of the TTS model to use. If empty, the default model will be used
      # Run "tts --list_models" to list models supported by coqui-tts
      # Some examples:
      # - "tts_models/en/ljspeech/tacotron2-DDC" (single speaker)
      # - "tts_models/zh-CN/baker/tacotron2-DDC-GST" (Chinese single speaker)
      # - "tts_models/multilingual/multi-dataset/your_tts" (multi-speaker)
      # - "tts_models/multilingual/multi-dataset/xtts_v2" (multi-speaker)
      model_name: "tts_models/en/ljspeech/tacotron2-DDC" # Model name
      speaker_wav: "" # Path to reference audio file
      language: "en" # Language
      device: "" # Device
-
Single Language Models:
- Default configuration is for English single language model
- For Chinese support, please change to a Chinese model (e.g.,
tts_models/zh-CN/baker/tacotron2-DDC-GST)
-
Multilingual Models:
speaker_wav: Path to reference audio file- Supports relative paths (e.g.,
./voices/reference.wav) - For Windows, when using absolute paths, change
\to\\ - Ensure the reference audio file exists at the specified location
- Supports relative paths (e.g.,
language: Set the preferred language- Set to
"zh"for Chinese - Set to
"en"for English - This parameter corresponds to
speaker_wav
- Set to
GPTSoVITS (Local Deployment, Moderate Performance)
Introduced in PR #40, officially released in version v0.4.0
GPT-SoVITS is a powerful speech synthesis engine capable of high-quality voice cloning.
Note: The official tutorial for GPTSoVITS is currently not comprehensive.
Some of the following content has been compiled from the Tencent Document, which was created by the users from the qq group before the release of v1.0.0 (the doc was blocked by tencent for some reason so it is no longer maintained).
If you encountered any problems or would like to improve the documentation, please use the edit button at the end of this page or just contact me.
GPTSoVITS-V2 Integration Package
miHoYo One-Click Package
If you are using the miHoYo one-click package:
First launch GPT SoVITS, then launch this project (uv run run_server.py).
You need to modify the following settings:
1: Change the tts option in conf.yaml to gpt_sovits (surely no one would overlook this step)
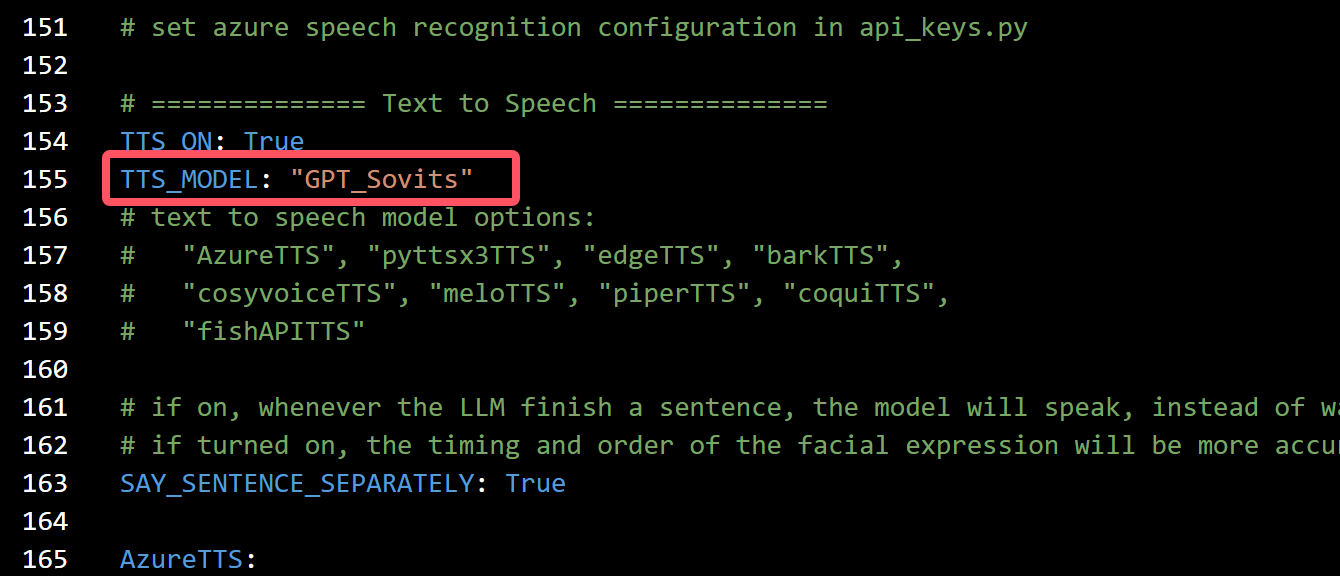
- This screenshot was taken before the release of
v1.0.0. Please entergpt_sovitsinstead ofGPT_Sovits.
2: Modify the corresponding configuration parameters in gpt_sovits below:
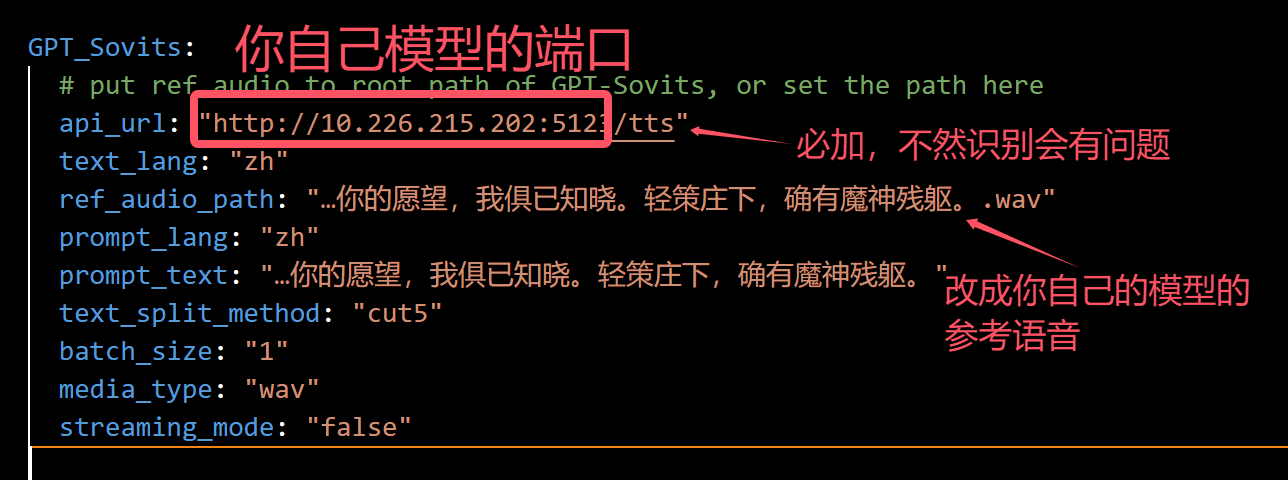 from top to bottom, the red text in the image says:
- The url of the GPT sovits server endpoint
- please have the
/ttsat the end of the url - change the
ref_audio_pathto the path of the reference audio of the model you use.
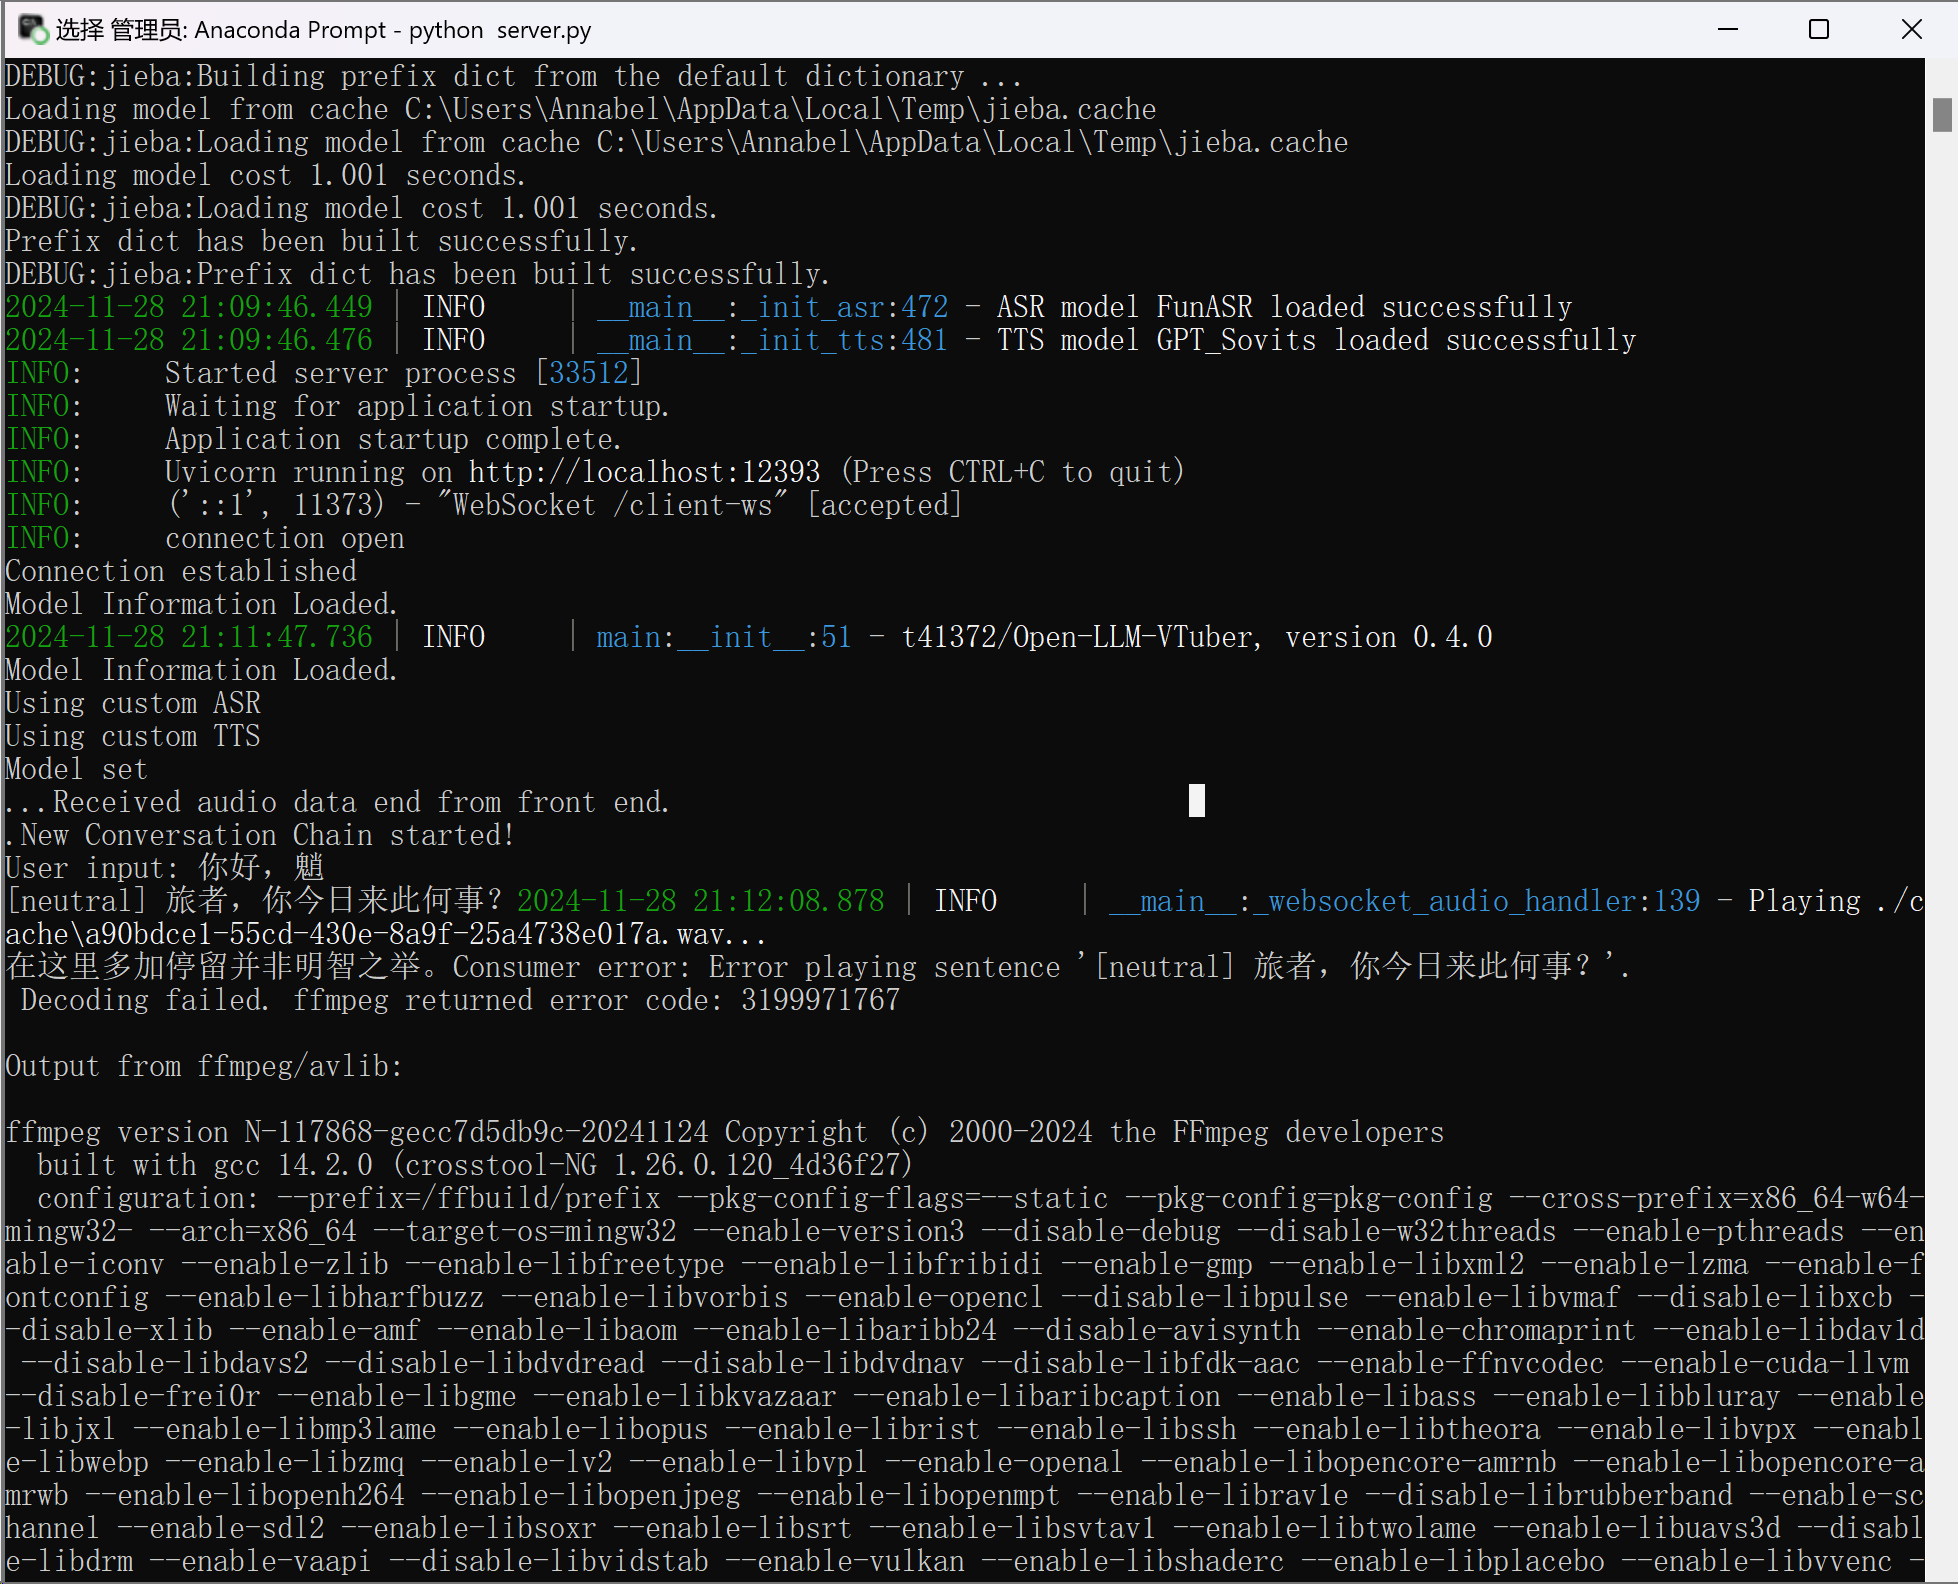
If it prompts that GPT-Sovits loaded successfully but ffmpeg reports a decoding failure, it's because you didn't add /tts:
If you are using the GPT-SovitsV2 integrated package:
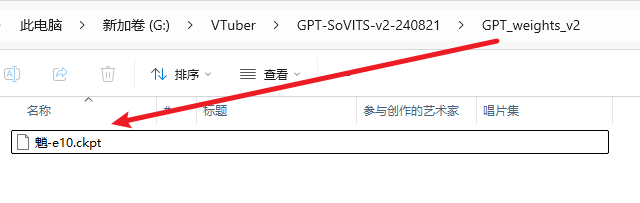
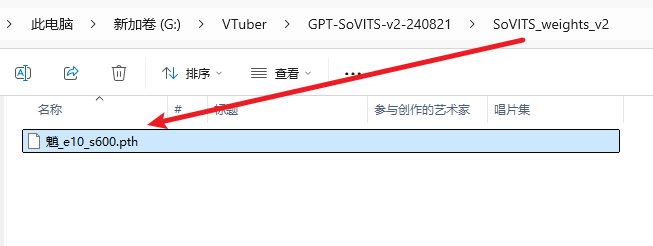
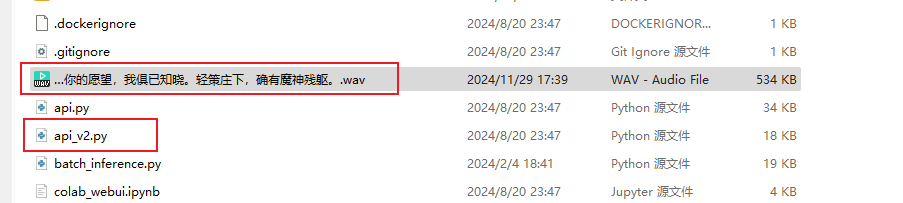
1: The modifications in conf.yaml are the same as the previous step, but place the corresponding models in the appropriate locations. Put the GPT model (with .ckpt extension) in the GPT_weights_v2 folder, the SoVITS model (with .pth extension) in the SoVITS_weights_v2 folder. If you don't change the location of the reference audio, it should be placed in the GPT-Sovits root directory, alongside api_v2.py;
2: Run GPT-SovitsV2, navigate to the GPT-Sovits root directory, and in the prompt run python api_v2.py -a 0.0.0.0.
If there's no response, use the Python that comes with the integrated package, and in the prompt run runtime\python.exe api_v2.py. When it prompts "TTS config", it indicates that it has loaded successfully. You can then leave it running in the background.
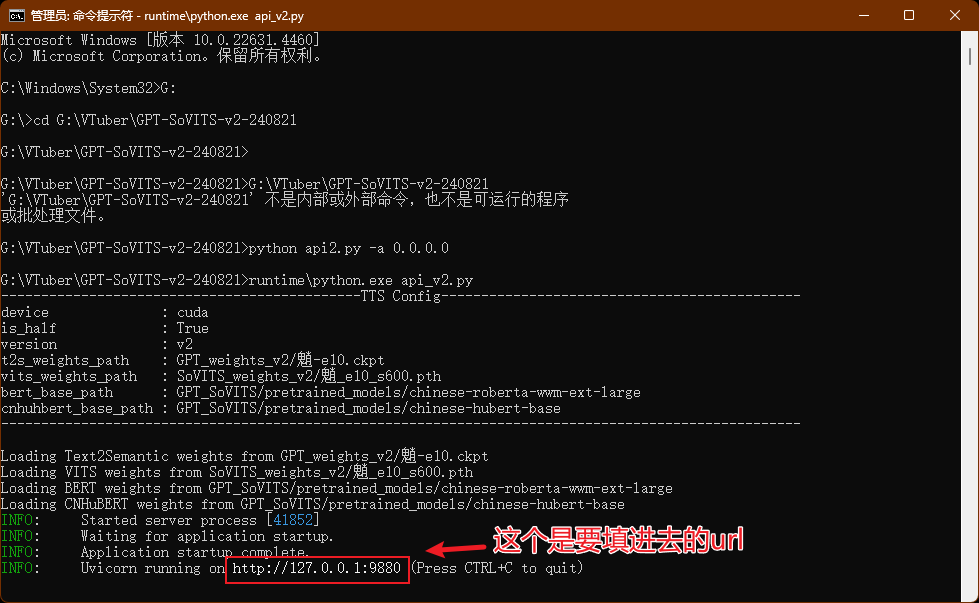
- the red text says: this is the url you need to put into conf.yaml
Bark (Local Deployment, Relatively Slow)
- Install dependencies:
uv pip install git+https://github.com/suno-ai/bark.git - Set
tts_model: bark_ttsinconf.yaml - Required models will be automatically downloaded on first launch
CosyVoice TTS (Local Deployment, Slower)
- Configure and start WebUI according to CosyVoice Official Documentation
- Refer to the API documentation in WebUI to configure the
cosyvoice_ttssection inconf.yaml
CosyVoice2 TTS (Local Deployment)
- Set up the environment according to CosyVoice Official Documentation
- Download CosyVoice2 model
CosyVoice2-0.5B - Modify CosyVoice's
webui.pyfile-
audio_output = gr.Audio(label="Synthesized Audio", autoplay=True, streaming=True)
change to ->
audio_output = gr.Audio(label="Synthesized Audio", autoplay=True, streaming=False) -
   logging.info('get instruct inference request')
   set_all_random_seed(seed)
   for i in cosyvoice.inference_instruct(tts_text, sft_dropdown, instruct_text, stream=stream, speed=speed):
       yield (cosyvoice.sample_rate, i['tts_speech'].numpy().flatten())
change to ->
        logging.info('get instruct inference request')
        prompt_speech_16k = postprocess(load_wav(prompt_wav, prompt_sr))
        set_all_random_seed(seed)
        for i in cosyvoice.inference_instruct2(tts_text, instruct_text, prompt_speech_16k, stream=stream, speed=speed):
            yield (cosyvoice.sample_rate, i['tts_speech'].numpy().flatten())
-
- Start CosyVoice WebUI
- Install gradio_client in this project using the command
uv add gradio_client - Configure the
cosyvoice2_ttssection inconf.yaml
Currently, only the base model of CosyVoice2 - CosyVoice2-0.5B has been released, which only supports "3s Quick Voice Cloning", "Cross-lingual Voice Cloning", and "Natural Language Control"
- In "3s Quick Voice Cloning" mode, you need to fill in prompt_wav_upload_url and prompt_wav_record_url as reference audio, and prompt_text as the corresponding text for the reference audio
- In "Cross-lingual Voice Cloning" mode, you need to fill in prompt_wav_upload_url and prompt_wav_record_url as reference audio. Best results are achieved when the generated audio language differs from the reference audio language
- In "Natural Language Control" mode, you need to fill in prompt_wav_upload_url and prompt_wav_record_url as reference audio, and instruct_text as the control instruction, such as "speak Cantonese", "use an enthusiastic tone"
Please fill in prompt_wav_upload_url and prompt_wav_record_url with the same path It's recommended to set stream (streaming generation) to False, as this project already includes voice segment synthesis (definitely not because setting it to True causes bugs)
X-TTS (Local Deployment, Relatively Slow)
Available since version
v0.2.4(PR#23)
It is recommended to use xtts-api-server, which provides clear API documentation and is relatively easy to deploy.
Edge TTS (Online, No API Key Required)
- Features:
- Fast response speed
- Requires maintaining network connection
- Configuration: Set
tts_model: edge_ttsinconf.yaml
Fish Audio TTS (Online, API Key Required)
Available since version
v0.3.0-beta
- Install dependencies:
uv pip install fish-audio-sdk
- Configuration steps:
- Register an account on Fish Audio and obtain an API key
- Select the desired voice and copy its Reference ID
- In
conf.yaml, set:tts_model: fish_api_tts- Fill in
api_keyandreference_idin thefish_api_ttssection
Azure TTS (Online, API Key Required)
The same TTS service as neuro-sama
- Obtain an API key for the text-to-speech service from Azure
- Fill in the relevant configuration in the
azure_ttssection ofconf.yaml
Since version v0.2.5, api_key.py has been deprecated. Please make sure to set the API key in conf.yaml
The default voice used in conf.yaml is the same as neuro-sama
SiliconFlow TTS (Online, API Key Required)
An online text-to-speech service provided by SiliconFlow, supporting custom audio models and voice configuration.
Configuration Steps
-
Upload Reference Audio:
SiliconFlow currently offers models likeFunAudioLLM/CosyVoice2-0.5B. To use them, upload reference audio via their official platform:
https://docs.siliconflow.cn/cn/api-reference/audio/upload-voice -
Fill in
conf.yaml:
In thesiliconflow_ttssection of the configuration file, configure parameters as follows (example):
siliconflow_tts:
  api_url: "https://api.siliconflow.cn/v1/audio/speech"  # Service endpoint (fixed value)
  api_key: "sk-yourkey"  # API key obtained from SiliconFlow's official website
  default_model: "FunAudioLLM/CosyVoice2-0.5B"  # Audio model name (check official docs for supported models)
  default_voice: "speech:Dreamflowers:aaaaaaabvbbbasdas"  # Voice ID (generated after uploading custom voice on the official site)
  sample_rate: 32000  # Output sample rate; adjust if audio is distorted (e.g., 16000, 44100)
  response_format: "mp3"  # Audio format (e.g., mp3, wav)
  stream: true  # Enable streaming mode
  speed: 1  # Speaking speed (range: 0.5–2.0; 1 = default)
  gain: 0  # Volume gain (range: -10–10; 0 = default)
MiniMax TTS (Online, API Key Required)
MiniMax provides an online TTS service where models like speech-02-turbo offer powerful TTS capabilities with customizable voice options.
Configuration Steps
-
Obtain
group_idandapi_keyYou can register on the Minimax official website to get yourgroup_idandapi_key, Official Documentation -
Fill in the
conf.yamlconfiguration In theminimax_ttssection of the configuration file, enter parameters in the following format (example):
minimax_tts:
      group_id: '' # Your minimax group_id
      api_key: '' # Your minimax api_key
      # Supported models: 'speech-02-hd', 'speech-02-turbo' (recommended: 'speech-02-turbo')
      model: 'speech-02-turbo' # minimax model name
      voice_id: 'female-shaonv' # minimax voice id, default is 'female-shaonv'
      # Custom pronunciation dictionary, default empty.
      # Example: '{"tone": ["测试/(ce4)(shi4)", "危险/dangerous"]}'
      pronunciation_dict: ''
The voice_id parameter can be configured to different voice tones. You can check the voice ID query section in the official documentation for a complete list of supported voices. The pronunciation_dict supports custom pronunciation rules - for example, you can define rules to pronounce "牛肉" as "neuro" using the format shown in the example.
ElevenLabs TTS (Online, API Key Required)
Available since version
v1.2.1
ElevenLabs provides high-quality, natural-sounding text-to-speech with support for multiple languages and voice cloning capabilities.
Features
- High-Quality Audio: Industry-leading speech synthesis quality
- Multi-language Support: Supports English, Chinese, Japanese, Korean, and many other languages
- Voice Cloning: Upload audio samples to clone voices
- Rich Voice Library: Multiple preset voices and community voices available
- Real-time Generation: Low-latency speech synthesis
Configuration Steps
-
Register and Get API Key
- Visit ElevenLabs to register an account
- Get your API key from the ElevenLabs dashboard
-
Choose a Voice
- Browse available voices in the ElevenLabs dashboard
- Copy the Voice ID of your preferred voice
- You can also upload audio samples for voice cloning
-
Configure
conf.yamlIn theelevenlabs_ttssection of your configuration file, enter parameters as follows:
elevenlabs_tts:
  api_key: 'your_elevenlabs_api_key'  # Required: Your ElevenLabs API key
  voice_id: 'JBFqnCBsd6RMkjVDRZzb'   # Required: ElevenLabs Voice ID
  model_id: 'eleven_multilingual_v2'  # Model ID (default: eleven_multilingual_v2)
  output_format: 'mp3_44100_128'      # Output audio format (default: mp3_44100_128)
  stability: 0.5                      # Voice stability (0.0 to 1.0, default: 0.5)
  similarity_boost: 0.5               # Voice similarity boost (0.0 to 1.0, default: 0.5)
  style: 0.0                         # Voice style exaggeration (0.0 to 1.0, default: 0.0)
  use_speaker_boost: true            # Enable speaker boost for better quality (default: true)
Parameter Descriptions
- api_key (required): Your ElevenLabs API key
- voice_id (required): Unique identifier for the voice, found in your ElevenLabs dashboard
- model_id: TTS model to use. Available options:
eleven_multilingual_v2(default) - Supports multiple languageseleven_monolingual_v1- English onlyeleven_turbo_v2- Faster generation
- output_format: Audio output format. Common options:
mp3_44100_128(default) - MP3, 44.1kHz, 128kbpsmp3_44100_192- MP3, 44.1kHz, 192kbpspcm_16000- PCM, 16kHzpcm_22050- PCM, 22.05kHzpcm_24000- PCM, 24kHzpcm_44100- PCM, 44.1kHz
- stability: Controls voice consistency (0.0 = more variable, 1.0 = more consistent)
- similarity_boost: Enhances similarity to the original voice (0.0 to 1.0)
- style: Controls style exaggeration (0.0 = neutral, 1.0 = more expressive)
- use_speaker_boost: Enables speaker boost for improved audio quality
Usage Tips
- Voice Selection: Try preset voices first, then consider voice cloning for custom voices
- Parameter Tuning: Adjust
stabilityandsimilarity_boostfor optimal results - Cost Management: ElevenLabs charges based on usage, test first before heavy usage
- Network Requirements: Stable internet connection required for service availability
ElevenLabs offers free trial credits, so you can test the quality before purchasing a paid plan.